Navigation

Home       About       Parties       Contact          

We're going to have a shop!

Friday, August 24, 2012

Shop Announcement
I know that I haven't written in a while, but that's because I've been working hard on new designs and party products to stock a shop that Paper & Party Love will be a part of.  I'm so excited to announce that the shop is opening in just two weeks, on September 8, in Hirzel in Switzerland.  It is a kids boutique, called 4Times, selling new and secondhand kids clothing, handmade gifts and accessories, and our party products.  We'll have things like invitations, cupcake toppers, birthday banners, favor bags, and some party supplies ready-made in the shop.  All of those items can also be personalized and handmade for your party. You can still have the option to get the items as printables if you prefer. 

We'll also have ready-made party boxes with party themes like pirate, dinosaur, cupcake and movie, just to name a few.  Just pick up a box and you'll have everything to make your party pretty! The goal is to make it easier for you to have memorable events. 

I look forward to meeting some of you in our store!

Gabriel's Magic Party

Friday, July 20, 2012

You saw the magic wand invitations and the tutorial, now see the party!  The magic party for Gabriel was held last week. I've known Gabriel since he was born and it was great to help his mom create a party for him at home.  His kindergarten class has been learning about magic and he invited everyone to the party.  He was so excited in the days leading up to the party that he kept asking his mom "when is it?". All his waiting paid off and the day of his magic party finally arrived. From face painting, to "magic" food, to a magician that kept the kids laughing throughout, there was lots of fun to be had for the kids.
abracadabra banner
The food included things like Hocus Pocus Jello, a Magic Drink that changed colors when it was filled, magic popcorn with edible glitter for the magic effect and Disappearing Pizza, which really did disappear quickly!
Hocus Pocus Jello & Magic Drink
And of course, we can't forget the cake.  It was in the shape of a top hat with rabbit ears sticking out of it.   Naturally, there were cupcakes also.
Magic Hat Cake and Party Circles
At the end of the party, the kids all received a goody bag filled with all kinds of magic treats.
Favor Bags
Thanks to Sharon and Gabriel for letting me help out with their party.  Looking forward to brainstorming more ideas for next year!

Magic Wand Invitation Tutorial

Wednesday, June 27, 2012

Magic Wand Tutorial

On Monday, I showed you the fabulous magic wand invitations that my friend and I made for her son's upcoming magic themed party.  Today, I'm going to show you how we made them.  They were not that hard to make and used supplies that you probably already have at home.  

Supplies:

Black Construction Paper
White Copy Paper
White Crayon
Glue
Ribbon
Scissors
Hole Punch

Step 1: Cut a sheet of black construction paper in half lengthwise.  We used a large piece of construction paper, so we ended up cutting it in fourths.  Roll it up and glue the end to close it.
magic wand invitations

Step 2: Cut two strips approximately 1 inch/2.5 cm high from the white copy paper.  Make them long enough to go around the wand about 2 times. This helps to keep the wand closed up.  Glue one strip to each end of the wand. Allow to dry.

magic wand invitations

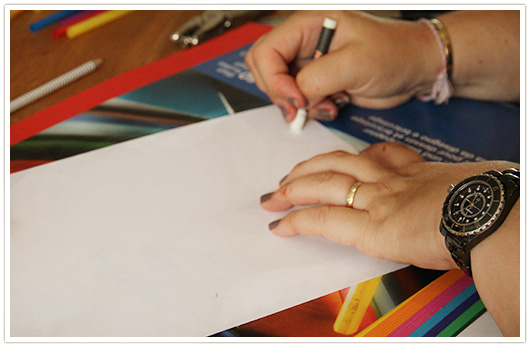
Step 3: Use a full sheet of white copy paper and write your party details on it with a white crayon.

magic wand invitations

Step 4: Punch a hole in the top of the paper and attach a ribbon to it.

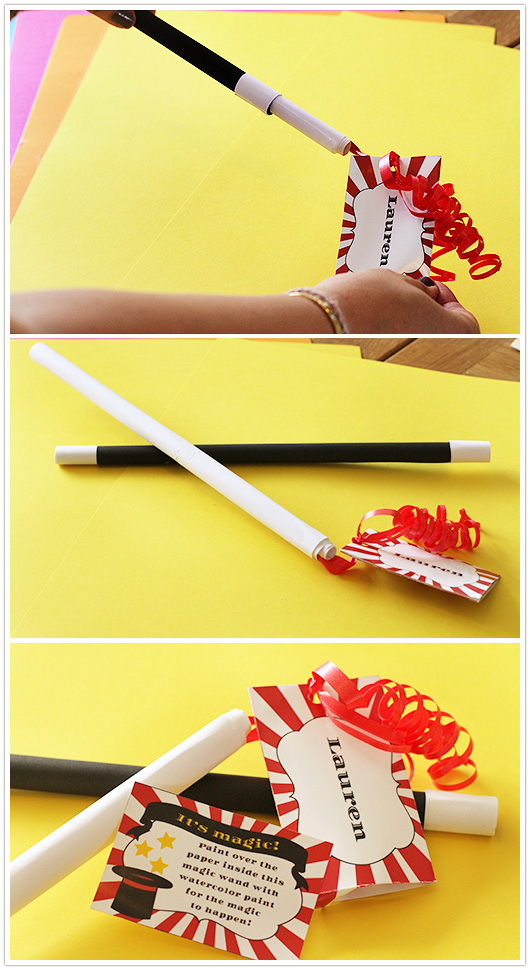
Step 5: Tightly roll up the sheet of paper and insert it into the wand that you made.

Step 6: Attach the envelope with the instructions inside to the ribbon. Curl the ribbon.

Step 7: Abracadabra...you're finished! Hand deliver them to your guests and watch them smile.

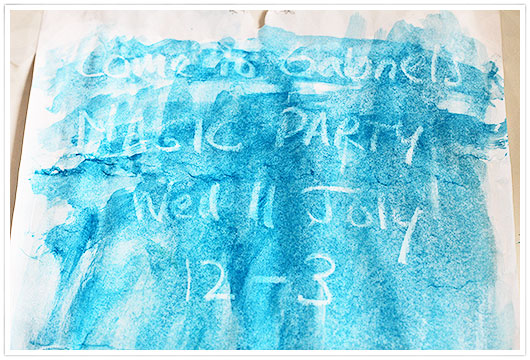
This is what they will see when they paint over the paper...

magic wand invitations

Magic Wand Invitations

Monday, June 25, 2012

magic wand invitations
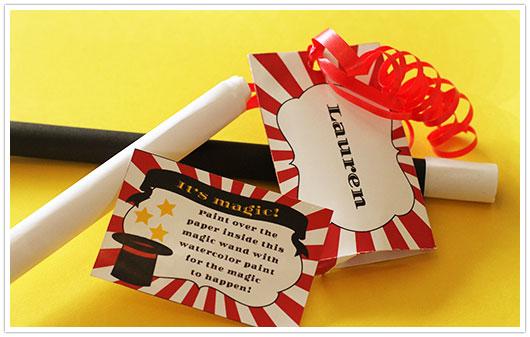
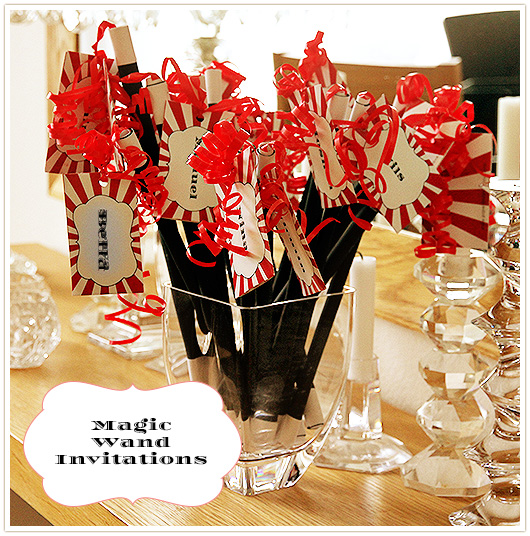
I am so excited to show you these invitations! One of my good friends asked me to help her with her son's upcoming magic themed birthday party. After some brainstorming, we came up with these fabulous magic wand invitations.  They turned out great and the kids were so excited to receive them!
magic wand invitations
The invitations were made out of black construction paper and regular white paper.  The black construction paper was used to make the wand itself and the white paper was used to make the white tips on both sides of the wand. Inside the wand was another white sheet of paper where we wrote the party information in white crayon. It was then rolled up tightly, had some ribbon attached to it, and put inside the wand. It slid out of the wand when you pulled on the ribbon. Inside the envelope were instructions on how to magically make the information appear by painting over it with watercolor. View the video below to see how it all worked. The kids loved it! Talk about getting them excited for a party. 

Here's what the invitation revealed when it was painted over...

magic wand invitations

And below is a little video so that you can see the how the wands worked. Enjoy!


Come back tomorrow for a tutorial on how we made the wands.  They were not difficult to make, it just took some time since we had to make so many!


Happy Friday :: Sponge Balls

Friday, June 15, 2012

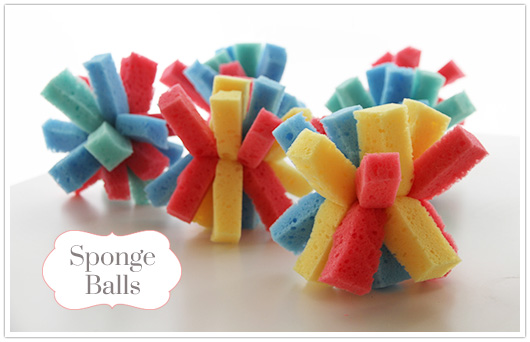
sponge balls

We love Fridays around here.  It's the end of the (usually stressful) week, and we like to celebrate.  And by celebrate, I mean doing something a little different, not a big party, just something that is fun for everyone.  Sometimes we order pizza and watch a movie, sometimes we eat dinner on our balcony, or sometimes, like tonight, we have friends come over for a drink.

It's supposed to be hot, hot, hot, so I'm going to make some mojitos for the adults.  And since the kids are invited too, I made them these sponge balls to play with.  They are so easy to make and the kids love playing with things that make them wet.  You simply take a few sponges, cut them into strips, and then tie them together with some string.  I used about 9 strips for the ones that you see above.  For a more detailed tutorial, view this post. They are easier to use than water balloons (just drop them in a water bucket) and there's no danger of the littler ones eating the remnants of the popped balloons.

I'm looking forward to tonight.  The kids can enjoy the summer weather outside and the adults can enjoy mojitos and snacks.  Who knows, maybe the water fight will be too fun to resist and we'll all join in :-).

Hope you enjoy your weekend!
Related Posts Plugin for WordPress, Blogger...