Navigation

Home       About       Parties       Contact          
Showing posts with label recipe. Show all posts

Strawberry, Lemon & Mint Infused Water

Friday, June 27, 2014

Strawberry infused water

In keeping with our strawberry theme this week, I thought I would share with you a yummy alternative to soda for your summer parties.  It's very easy to make and looks pretty too!  It's great to serve at a get-together with your friends or to keep in the fridge to sip on throughout the day.

Strawberry Lemon Mint Infused Water

Ingredients:

The following worked well for me.  Feel free to adjust amounts depending on your pitcher size and personal preferences.
  • 6 Medium Sized Strawberries, Sliced
  • 1/2 of a Lemon, Sliced
  • 4 Mint Leaves, Torn
  • Water (you can also use sparkling water if you prefer)
  • Ice (optional)

Instructions:

1. Place strawberries, lemon and mint in a pitcher.
2. Add water (and ice if you are using it) to fill up your pitcher.
3. Serve and enjoy!

That's the end of our strawberry-themed week. I hope you enjoyed it! In case you missed them, take a look at our Hello Summer Strawberry Cake and our refreshing Strawberry Popsicle and Prosecco Drink. Enjoy the weekend!

Sweet Mondays: Coffee and Strawberry Lime Popsicles

Monday, May 26, 2014

Since it is Memorial Day today in the USA and as it usually signals the beginning of summer, I thought it would be great to feature popsicles for today's Sweet Mondays post. And no, not coffee and strawberry-lime together in one popsicle.  Two separate ones, of course! And since I couldn't decide which one I wanted more, fruity and fresh or creamy and rich, I made both.

Strawberry Lime Popsicles | Fruity and Fresh!

Here are the strawberry-lime ones which were very refreshing, but the lime parts were REALLY sour. I was hoping to make a striped popsicle, but it didn't turn out as nice as I hoped. Oh well, it still tasted good. My husband and kids are big fans of sour candy, so this one was a big hit! Here's how I made it:

Ingredients:
1/2 cup pureed strawberries
Juice of 1 lime
1/2 teaspoon sugar (add more if you would like it sweeter)

Directions: 
1. Mix in the sugar with the lime juice.
2. Depending on how many stripes you would like to have, pour the strawberry puree about 1/3 of the way into your popsicle mold and wait until it is frozen.
3. Once it is frozen, pour the lime juice mixture on top of that until it fills another third of your popsicle mold. 
4. Wait until the lime juice mixture is frozen before repeating step 2.
5. Freeze until they are ready. It usually takes about 6 hours if you are using regular popsicle molds.  I used the Zoku quick pop maker and it took only about 20 minutes for the popsicles to be ready(I am not getting paid to say this, I just use it and really like it!)

Makes 1 popsicle depending on your popsicle mold size*

*Note: I had enough strawberry puree to make one more popsicle. I made one using just the strawberries and it tasted great.  Very refreshing! No extra sugar needed.

Chocolate Coffee Cream Popsicles

And this one is the coffee flavored popsicle.  Coffee ice-cream lovers will enjoy this one!

Ingredients:
1/2 cup of cooled coffee
1/4 cup milk
2 teaspoons of Hershey's Chocolate Syrup
1/2 teaspoon sugar

Directions:
1. Mix all of the ingredients together.
2. Pour into your popsicle mold and freeze.
3. Once it is frozen, enjoy!

Makes 1 popsicle depending on your popsicle mold size.

I'm so excited that Summer is almost here. Let popsicle-eating season begin!

Watermelon Margaritas

Friday, May 2, 2014

Watermelon margarita | Paper & Party Love

My husband and I have been trying to eat healthier.  We just got off a Whole30 diet a couple of weeks ago and feel really good.  Now that it's almost Cinco de Mayo, we wanted to try to have some margaritas but didn't want to have one with a lot of sugar in it.  So, I tried a few variations and came up with these watermelon margaritas.  It's so simple and only has three ingredients...watermelon, lime juice and tequila.  The watermelon probably has a lot of sugar in it, but at least it is fruit sugar and not processed! These are really refreshing and go well with chips and salsa. Make up a pitcher and have a Cinco de Mayo party!

Watermelon Margarita | Paper & Party Love

Watermelon Margaritas

Ingredients
3/4 Cup Pureed Watermelon
1-2 Shots of Tequila (I used Patron Silver)
Juice of 1 Lime
Ice
Salt to rim your glass.

Instructions
1. Salt the rim of your glass and fill it with ice.
2. Add the pureed watermelon, 1-2 shots of tequila to taste, and the lime juice.  Mix together.
3. Enjoy!


Sweet Mondays: Margarita Cupcakes

Monday, April 28, 2014

Margarita Cupcakes | Paper & Party Love

Since Cinco de Mayo is coming up and many of you are most likely celebrating this weekend, I thought I would re-share these margarita cupcakes.  I made these cupcakes for last year's Cinco de Mayo celebration and they were a big hit at the party. These cupcakes are so yummy and I can say that this is my favorite cupcake. There is something about the tequila and lime mixed together with the sweetness of the frosting together that makes it taste so good.

This recipe is from Brown Eyed Baker and is definitely worth making.  If you like margaritas, you will love these cupcakes!

Ingredients:

For the Cupcakes:
1½ cups all-purpose flour
1½ teaspoons baking powder
¼ teaspoon salt
½ cup unsalted butter, at room temperature
1 cup granulated sugar
2 eggs, at room temperature
Zest and juice of 1½ limes
2 tablespoons tequila
¼ teaspoon vanilla extract
½ cup buttermilk

To Brush the Cupcakes:
1 to 2 tablespoons tequila

For the Tequila-Lime Frosting:
1 cup unsalted butter, at room temperature
2¾ cups powdered sugar
1 tablespoon lime juice
2 tablespoons tequila
Pinch of coarse salt

Instructions:

  1. Preheat your oven to 325 degrees Fahrenheit / 160 degrees Celsius and line your muffin pan with cupcake liners.
  2. In a bowl, mix together the flour, baking powder and salt. Set it aside for use later.
  3. In an electric mixer, cream the butter and sugar together until it is light and fluffy, about 5 minutes.
  4. Slow down the mixer speed and add the eggs one at a time, making sure each egg is mixed in thoroughly.
  5. Add the lime juice, lime zest , vanilla extract and tequila to the mixture. Mix until combined. It may start to look a little curdled at this point, but that is OK! I think at this point it already smells so good!
  6. Reduce the mixer speed to low and alternately add the flour mixture and the buttermilk. 
  7. Divide the batter between the muffin cups.  Bake for approximately 25 minutes or until a toothpick inserted into the cupcakes comes out clean.
  8. Allow the cupcakes to cool for about 5-10 minutes and then place them on a wire cooling rack. While they are still warm, brush the tops with 1-2 tablespoons of tequila. Allow the cupcakes to cool completely before frosting them.
  9. To make the frosting, use the whisk attachment on an electric mixer. Add in the butter and whip for 5 minutes on medium-high speed. 
  10. Reduce the speed to low and add in the powdered sugar. Once it is all mixed together, let the mixer run on medium speed for about 30 seconds. 
  11. Add the lime juice, tequila and salt and mix on medium-high speed until the frosting is fluffy.  If the frosting is too soft, add some more sugar until the desired consistency is reached.
  12. Frost the cupcakes and add a lime wedge for decoration.
  13. Enjoy!


Sweet Mondays: Churros

Monday, April 21, 2014

Churros | Paper & Party Love

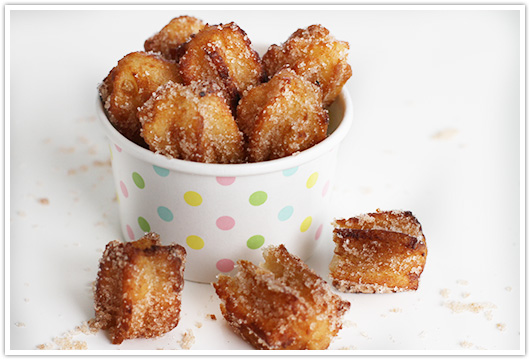
Sweet, crunchy on the outside and warm on the inside, and usually eaten with a chocolate sauce or with Nutella.  Who wouldn't love to eat churros? With Cinco de Mayo coming up soon, I thought I would share one of my family's favorite Mexican desserts.

We made some the other day and they are very easy to make.  The dough took about 5 minutes to prepare and as soon as the oil was heated up, they cooked fairly quickly too.  I made them in long strips with a churro maker, but I have read that some people simply use a large star decorating tip and a pastry bag to get the same shape.  I also made some that were bite size so that it was easier for the little ones to eat. Either way you make them, they are really good!

Bite-size churros | Paper & Party Love

Churros Recipe (adapted from allrecipes.com)

Ingredients

1 Cup Water
1 Tbsp. Sugar
1/2 Tsp. Salt
1 Tbsp.  Vegetable Oil
1 Cup All-Purpose Flour
Oil for Frying
1/2 Cup Sugar
1 Tsp. Cinnamon

Instructions

1. In a saucepan, add the water, 1 tablespoon of sugar, salt and 1 tablespoon of vegetable oil.  Bring these to a boil and then remove the pan from the heat.

2. Stir in 1 cup of flour until the dough forms a ball.  Set aside.

3. Heat the oil for frying in a deep pan or a dutch oven.  Heat the oil to 375 degrees fahrenheit (or 190 degrees celsius).  Pipe strips of the dough into the oil with a churro maker or with a pastry bag.  Fry the strips until they are a golden color and then drain them on paper towels. 

4. Combine 1/2 cup of sugar with 1 teaspoon cinnamon on a shallow plate. Roll the churros in the mixture.

5. Enjoy!


Sweet Mondays: Vanilla Cake With A Chocolate Ganache Drip

Monday, April 7, 2014

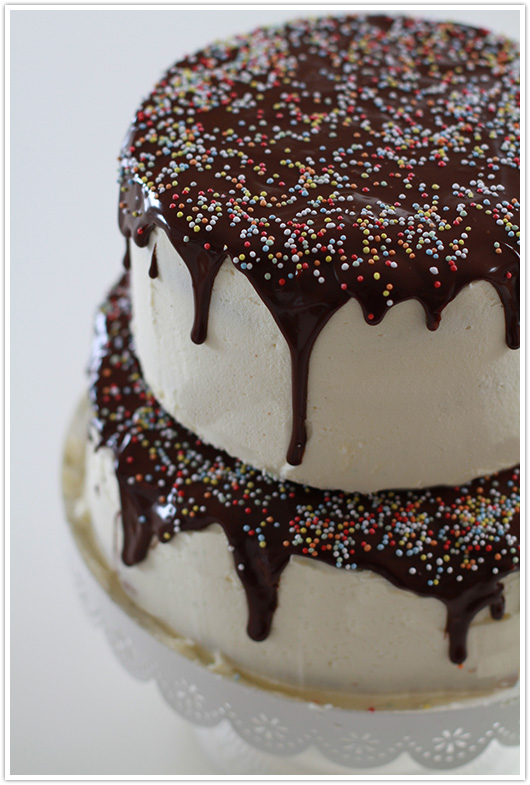
Vanilla Cake with a Chocolate Ganache Drip | Paper & Party Love

This was the cake for the party that never happened.  It was meant to be for my daughter’s 10th birthday party this past Saturday.  However, on Friday night, she came down with a high fever and we had to cancel the party.  She was really looking forward to it and was so sad that we couldn’t have it. Since I had already made the cake (and cupcakes too), we ended up having a small celebration of our own.  We ate cake (of course) and all ended up sleeping in the living room.  It was meant to be a slumber party, so we dragged some mattresses into the living room and had a family slumber party instead.  My daughter is better now, and no, we didn’t eat all of the cake ourselves.  It’s a big cake! We shared with our neighbors :-). 

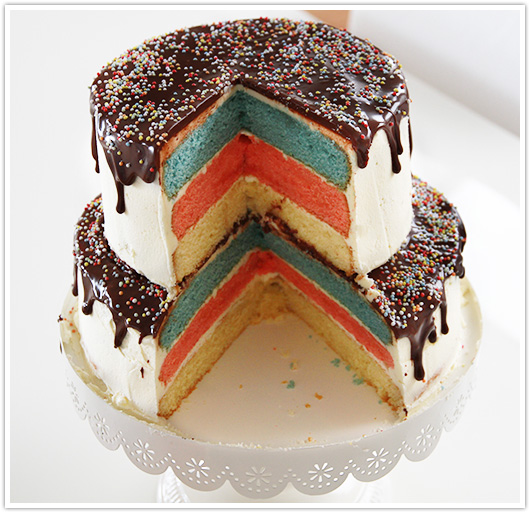
Inside of a Vanilla cake with a chocolate ganache drip | Paper & Party Love

This was my first time making a cake like this with the chocolate ganache drip.  I was nervous to try it out and here are some tips that helped me:

  • Make sure the ganache is thick, but not too thick.  If it’s too thick, it won’t run down the sides, and if it’s too thin, it will run down too much.  I watched this video to get a good feel for how thick it should be. 
  • I used a frosting spatula to help the ganache roll over the sides.  It helped to keep the ganache smooth on top while I was trying to push it over the edges.
  • Also, I think it helped that my cake was cold.  I put it in the fridge for about 1 hour before I poured over the ganache. I read that would help the warm ganache “freeze” on the sides. It worked for me!

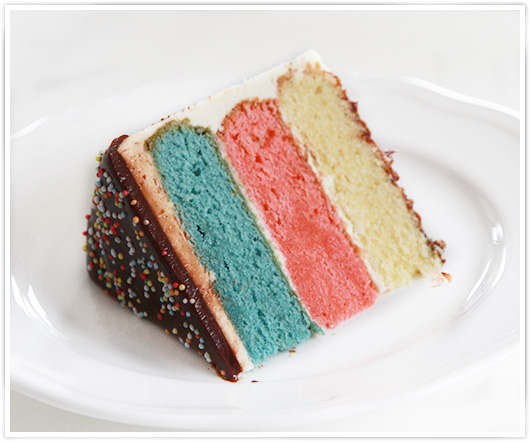
Cake slice | Paper & Party Love

The cake is a vanilla cake with a white buttercream frosting covered with a chocolate ganache drip. 

Cake recipe: 

Makes enough for all 6 layers of cake.

Ingredients:

Cake
12 eggs
660 grams / 24 oz of self-raising flour
660 grams / 24 oz of sugar
660 grams / 24 oz of butter at room temperature
2 tsp. of vanilla extract
Food coloring of your choice

Buttercream Frosting
2 cups butter at room temperature
5 cups powdered sugar

Chocolate Ganache
1 cup cream
9 ounces of chocolate

Cake Instructions:
  1. Preheat your oven to 180 C / 350 F and grease and flour your baking pans. 
  2. In a large bowl, cream the butter and sugar until it is light and fluffy, approximately 5 minutes.  
  3. Beat in the eggs one at a time.
  4. Add the vanilla extract.
  5. Pour in the flour a little at a time.  If the mixture is too thick, add milk one teaspoon at a time until you reach the desired consistency.
  6. At this time, to make the different colored layers, separate the batter evenly into three bowls.
  7. Add the food coloring to the batter to reach your desired color.  I used blue and pink (the colors of the party) and left the other layers a natural color.
  8. Pour the batter into your greased pans. To make the different sizes, I used a 7 inch and a 9 inch baking pan.
  9. Bake in the pre-heated oven for 15-20 minutes or until a toothpick inserted in the middle of the cake comes out clean.
  10. Cool your cake completely before frosting it.


Frosting:
  1. In an electric mixer, beat the butter until it is creamy.
  2. Slow down your electric mixer and slowly add in the powdered sugar.  
  3. If the mixture seems a bit dry, you can add in small amounts of milk (1 teaspoon at a time) to make it creamier.


Building Your Cake:
  1. Take the larger layers of cake and begin to stack them in the order of your choice.  In between each layer, add frosting. I used three layers.
  2. Add frosting to the top and sides of the cake.  
  3. Crumb coat your cake first, which means put a thinner layer of frosting on the cake and then place it in the freezer or fridge for about 20 minutes. This will help you get a smoother layer of frosting on the outside by “sealing” the crumbs.  
  4. Frost the cake and place it in the fridge again for about 30 minutes while you make the ganache.
  5. Repeat the steps for the smaller cakes.


Chocolate Ganache:
While the cakes are in the fridge, you can make the chocolate ganache.
  1. Chop your chocolate into small pieces and place it in a bowl that can withstand some heat.
  2. Heat the cup of cream on the stove.  Heat it until it just begins to boil.  There will be some foam around the edges when it is ready.
  3. Pour the cream over the chocolate.
  4. Whisk the cream and chocolate together until smooth.
  5. Let it sit for about 5-10 minutes. It will thicken up a bit while it is cooling off.
  6. Once it is not so warm anymore, pour it over your cold cakes.
  7. Add sprinkles if desired.
  8. Put the cakes in the fridge again for a few minutes to “set” the ganache before serving.

I stacked the cakes after the ganache was set in the fridge.  Once it was ready, I simply stacked the smaller cake on top of the bigger cake.  I believe that you are supposed to use cake dowels and place the smaller level on a piece of cardboard for stability and so that the cake doesn’t collapse.  I did not do this and it is still standing two days later.  If this was for a wedding or a more formal occasion, I probably would have tried to use these items to be sure that the cake wouldn’t topple over or collapse.

I hope you enjoy the cake!
Related Posts Plugin for WordPress, Blogger...