Navigation

Home       About       Parties       Contact          
Showing posts with label sweet mondays. Show all posts

Sweet Mondays:Sprüngli Luxembergerli

Monday, September 1, 2014

Luxembergerli
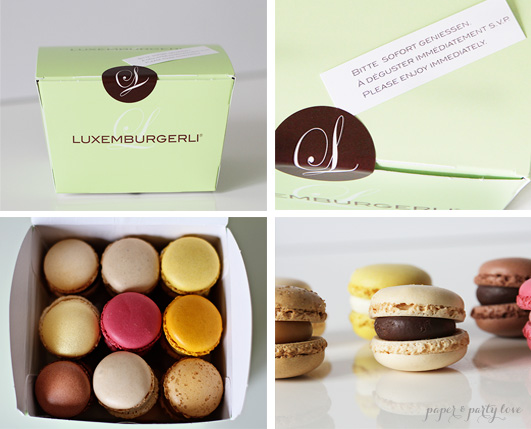
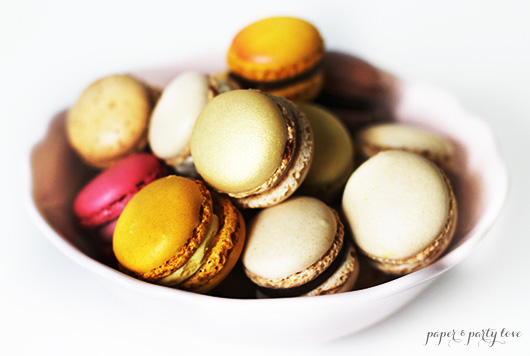
Happy Monday everyone! Today for your sweet inspiration, we have Luxemburgerlis, which are Switzerland's version of the macaron. They look a little bit like mini colorful hamburgers and come in all kinds of flavors. They usually have a flavor of the month based on what's in season (last month it was mango), some special ones like champagne, as well as classics like chocolate, strawberry and vanilla. It doesn't matter what flavor you choose, they are all yummy. They are smaller and fluffier than a traditional macaron. They are bite size and once they hit your tongue the flavors erupt and it melts in your mouth. Can you tell I love these?
Luxumburgerli from Confiserie Sprungli

The Luxemburgerli is made by Confiserie Sprüngli, which is one of the oldest chocolate factories in Switzerland. The Luxemburgerli was first made in the late 1950s and gets its name because the person who first produced them came from Luxemburg. The Swiss often add -li to the end of words to mean something small and cute (i.e. Schatzeli, from the german word Schatze meaning treasure). Today they are very popular and to enjoy it the best you have to eat them when they are fresh. There is a note attached to each box that says "Please Enjoy Immediately". If they stay out too long, they may lose their airy consistency. There is never a problem of them staying out too long at our house! 

These are pretty unique to Switzerland and I recommend trying them if you are here for a visit.  If you live here, you already know how good they are.  They are great for parties or get-togethers, and you can choose a mix of them or just the ones that match your party colors. They are sure to be a hit!

Sweet Mondays: Ice Cream Scoop Cake

Monday, July 21, 2014

Ice Cream Scoop Cake
This week is going to be all about ice cream.  School is finally out for summer and my daughters and I decided to have an ice cream party.  They helped to decorate and got out all of the toppings for the ice cream. It was a fun way to celebrate the end of the school year. More pictures from the party will come this week.

In the meantime, here is the "cake" we made for our little party.  All we did was scoop ice cream into a tower and put some toothpick flags on them to make it more festive.  And if you wanted to use that idea for a birthday, you can just put a candle on top. But make sure you work quickly...it melts fast!
Ice Cream Scoop Cake
To serve this, you can just pass out spoons and share the ice cream.  You can also take the scoops off the "cake" and serve it in bowls or cute ice cream cups. Don't forget the toppings!

Sweet Mondays: A Hello Summer Strawberry Cake

Monday, June 23, 2014


Hello Summer Strawberry Cake

Summer is officially here! My family and I picked our own strawberries at a farm this weekend. We enjoyed talking to the other pickers and sharing recipes. We had so much fun that by the time we knew it, we had a big boxful!

Since we had so many strawberries, I made a few things with them that I'll be sharing with you this week. First up is this cake that I made to bring to a summer BBQ. It is a strawberry cake, from scratch, that uses strawberry puree in the batter.  The frosting is a strawberry buttercream, also made with fresh strawberry puree, and as my friend said, it tasted "amazing".

I wish I could take credit for the recipe, but I can't.  I used this recipe and followed it pretty closely. The only changes I made were to add a layer of strawberries in between the cake layers, and to add a strawberry "flower" on top of the cake. I also made a "Hello Summer" cake topper to tie it to the summer theme and to make my cake a little less ordinary.

Strawberry cake flower

I highly recommend trying the recipe. It really does taste as good as it looks. 

Coming soon: Strawberry Popsicles with Prosecco!

Party Hat Ice Cream Topper

Monday, June 9, 2014

Party Hat Ice Cream Topper | Paper & Party Love

It's getting hot outside and that usually means that we'll be having lots of ice cream.  Instead of having your ice cream plain, why not make a party out of it? Top your scoops off with these fun party hats made out of ice cream cones, sprinkles and gumballs! 

DIY Party Hat Ice Cream Topper | Paper & Party Love


Ingredients needed:
Ice cream cones
Sprinkles
Chocolate
Mini gumballs

Instructions:

1. Cut off the tops of your cones to create mini cones.  Then cut off the pointy end of the cone to make it flat so that the gumball can sit on top of it.

2. Pour your sprinkles into a bowl.

3. Melt the chocolate either in the microwave or using a double boiler. I used white chocolate in the picture above, but you can use whatever chocolate you prefer. Once it is melted, scoop it into a small bowl.

3.  Take one of the cones and dip the wider end first in the chocolate and then into your bowl of sprinkles.

4. Dip the other side of the cone into the chocolate and then into the sprinkles.  Place your gumball on top and you are finished!

5.Scoop your ice cream into a cup or a cone. Top with your party hats and enjoy!


Party hat ice cream topper on a cone | Paper & Party Love

Party hat ice cream topper by Paper & Party Love

These are so much fun for an ice cream party, on top of cupcakes for a circus-themed party, or just for a special treat with ice cream at home.

Sweet Mondays: Flamingo Cupcake Toppers

Monday, June 2, 2014

Flamingo Cupcakes | Paper & Party Love

There's not really too much to say about these except, aren't they cute?  I am participating in a summer market this Friday and was thinking about selling these toppers as a set with the cupcake liners. Naturally I had to try them out and see how they look. Hope you enjoyed seeing this sweet inspiration for your Monday.  Have a great week everyone!

Sweet Mondays: Coffee and Strawberry Lime Popsicles

Monday, May 26, 2014

Since it is Memorial Day today in the USA and as it usually signals the beginning of summer, I thought it would be great to feature popsicles for today's Sweet Mondays post. And no, not coffee and strawberry-lime together in one popsicle.  Two separate ones, of course! And since I couldn't decide which one I wanted more, fruity and fresh or creamy and rich, I made both.

Strawberry Lime Popsicles | Fruity and Fresh!

Here are the strawberry-lime ones which were very refreshing, but the lime parts were REALLY sour. I was hoping to make a striped popsicle, but it didn't turn out as nice as I hoped. Oh well, it still tasted good. My husband and kids are big fans of sour candy, so this one was a big hit! Here's how I made it:

Ingredients:
1/2 cup pureed strawberries
Juice of 1 lime
1/2 teaspoon sugar (add more if you would like it sweeter)

Directions: 
1. Mix in the sugar with the lime juice.
2. Depending on how many stripes you would like to have, pour the strawberry puree about 1/3 of the way into your popsicle mold and wait until it is frozen.
3. Once it is frozen, pour the lime juice mixture on top of that until it fills another third of your popsicle mold. 
4. Wait until the lime juice mixture is frozen before repeating step 2.
5. Freeze until they are ready. It usually takes about 6 hours if you are using regular popsicle molds.  I used the Zoku quick pop maker and it took only about 20 minutes for the popsicles to be ready(I am not getting paid to say this, I just use it and really like it!)

Makes 1 popsicle depending on your popsicle mold size*

*Note: I had enough strawberry puree to make one more popsicle. I made one using just the strawberries and it tasted great.  Very refreshing! No extra sugar needed.

Chocolate Coffee Cream Popsicles

And this one is the coffee flavored popsicle.  Coffee ice-cream lovers will enjoy this one!

Ingredients:
1/2 cup of cooled coffee
1/4 cup milk
2 teaspoons of Hershey's Chocolate Syrup
1/2 teaspoon sugar

Directions:
1. Mix all of the ingredients together.
2. Pour into your popsicle mold and freeze.
3. Once it is frozen, enjoy!

Makes 1 popsicle depending on your popsicle mold size.

I'm so excited that Summer is almost here. Let popsicle-eating season begin!

Sweet Mondays: Polka Dot Cupcakes

Monday, May 19, 2014

polka dot cupcakes
Image source: Las Recetas de la Felicidad
I am in love with these adorable polka dot cupcakes! Interestingly enough, they are cooked using steam and not baked in an oven.  View the instructions and recipe on Las Recetas de la Felicidad.

Sweet Mondays: Margarita Cupcakes

Monday, April 28, 2014

Margarita Cupcakes | Paper & Party Love

Since Cinco de Mayo is coming up and many of you are most likely celebrating this weekend, I thought I would re-share these margarita cupcakes.  I made these cupcakes for last year's Cinco de Mayo celebration and they were a big hit at the party. These cupcakes are so yummy and I can say that this is my favorite cupcake. There is something about the tequila and lime mixed together with the sweetness of the frosting together that makes it taste so good.

This recipe is from Brown Eyed Baker and is definitely worth making.  If you like margaritas, you will love these cupcakes!

Ingredients:

For the Cupcakes:
1½ cups all-purpose flour
1½ teaspoons baking powder
¼ teaspoon salt
½ cup unsalted butter, at room temperature
1 cup granulated sugar
2 eggs, at room temperature
Zest and juice of 1½ limes
2 tablespoons tequila
¼ teaspoon vanilla extract
½ cup buttermilk

To Brush the Cupcakes:
1 to 2 tablespoons tequila

For the Tequila-Lime Frosting:
1 cup unsalted butter, at room temperature
2¾ cups powdered sugar
1 tablespoon lime juice
2 tablespoons tequila
Pinch of coarse salt

Instructions:

  1. Preheat your oven to 325 degrees Fahrenheit / 160 degrees Celsius and line your muffin pan with cupcake liners.
  2. In a bowl, mix together the flour, baking powder and salt. Set it aside for use later.
  3. In an electric mixer, cream the butter and sugar together until it is light and fluffy, about 5 minutes.
  4. Slow down the mixer speed and add the eggs one at a time, making sure each egg is mixed in thoroughly.
  5. Add the lime juice, lime zest , vanilla extract and tequila to the mixture. Mix until combined. It may start to look a little curdled at this point, but that is OK! I think at this point it already smells so good!
  6. Reduce the mixer speed to low and alternately add the flour mixture and the buttermilk. 
  7. Divide the batter between the muffin cups.  Bake for approximately 25 minutes or until a toothpick inserted into the cupcakes comes out clean.
  8. Allow the cupcakes to cool for about 5-10 minutes and then place them on a wire cooling rack. While they are still warm, brush the tops with 1-2 tablespoons of tequila. Allow the cupcakes to cool completely before frosting them.
  9. To make the frosting, use the whisk attachment on an electric mixer. Add in the butter and whip for 5 minutes on medium-high speed. 
  10. Reduce the speed to low and add in the powdered sugar. Once it is all mixed together, let the mixer run on medium speed for about 30 seconds. 
  11. Add the lime juice, tequila and salt and mix on medium-high speed until the frosting is fluffy.  If the frosting is too soft, add some more sugar until the desired consistency is reached.
  12. Frost the cupcakes and add a lime wedge for decoration.
  13. Enjoy!


Sweet Mondays: Churros

Monday, April 21, 2014

Churros | Paper & Party Love

Sweet, crunchy on the outside and warm on the inside, and usually eaten with a chocolate sauce or with Nutella.  Who wouldn't love to eat churros? With Cinco de Mayo coming up soon, I thought I would share one of my family's favorite Mexican desserts.

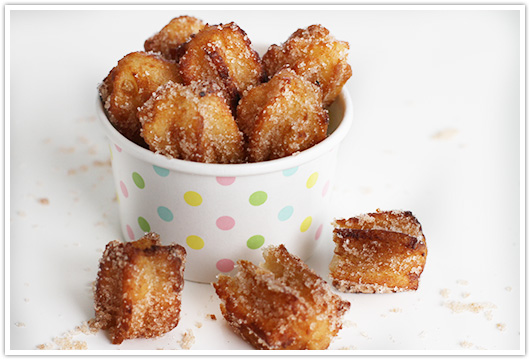
We made some the other day and they are very easy to make.  The dough took about 5 minutes to prepare and as soon as the oil was heated up, they cooked fairly quickly too.  I made them in long strips with a churro maker, but I have read that some people simply use a large star decorating tip and a pastry bag to get the same shape.  I also made some that were bite size so that it was easier for the little ones to eat. Either way you make them, they are really good!

Bite-size churros | Paper & Party Love

Churros Recipe (adapted from allrecipes.com)

Ingredients

1 Cup Water
1 Tbsp. Sugar
1/2 Tsp. Salt
1 Tbsp.  Vegetable Oil
1 Cup All-Purpose Flour
Oil for Frying
1/2 Cup Sugar
1 Tsp. Cinnamon

Instructions

1. In a saucepan, add the water, 1 tablespoon of sugar, salt and 1 tablespoon of vegetable oil.  Bring these to a boil and then remove the pan from the heat.

2. Stir in 1 cup of flour until the dough forms a ball.  Set aside.

3. Heat the oil for frying in a deep pan or a dutch oven.  Heat the oil to 375 degrees fahrenheit (or 190 degrees celsius).  Pipe strips of the dough into the oil with a churro maker or with a pastry bag.  Fry the strips until they are a golden color and then drain them on paper towels. 

4. Combine 1/2 cup of sugar with 1 teaspoon cinnamon on a shallow plate. Roll the churros in the mixture.

5. Enjoy!


Sweet Mondays: Easter Flower Pot Cupcakes

Monday, April 14, 2014

Carrot Top Cupcakes | Paper & Party Love

Since Easter is this Sunday, I thought I would share an Easter-themed sweet this week.  These adorable cupcakes were made by my friend Sharon for that same Easter party that I talked about last week. These are chocolate gluten-free cupcakes made in a silicone flower pot.


She stuck a marzipan carrot on top and smashed an extra cupcake to use as the "dirt". They look great and I can tell you that they tasted really good too!  


To get the recipe, visit Sharon's blog


Sweet Mondays: Vanilla Cake With A Chocolate Ganache Drip

Monday, April 7, 2014

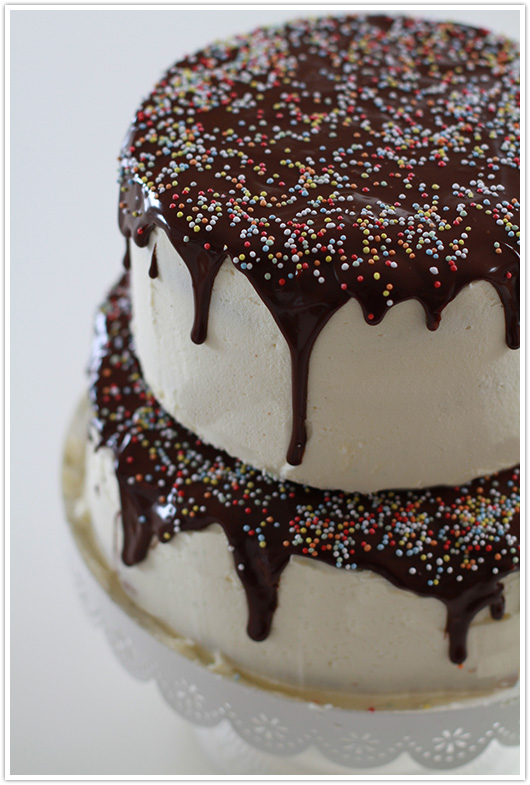
Vanilla Cake with a Chocolate Ganache Drip | Paper & Party Love

This was the cake for the party that never happened.  It was meant to be for my daughter’s 10th birthday party this past Saturday.  However, on Friday night, she came down with a high fever and we had to cancel the party.  She was really looking forward to it and was so sad that we couldn’t have it. Since I had already made the cake (and cupcakes too), we ended up having a small celebration of our own.  We ate cake (of course) and all ended up sleeping in the living room.  It was meant to be a slumber party, so we dragged some mattresses into the living room and had a family slumber party instead.  My daughter is better now, and no, we didn’t eat all of the cake ourselves.  It’s a big cake! We shared with our neighbors :-). 

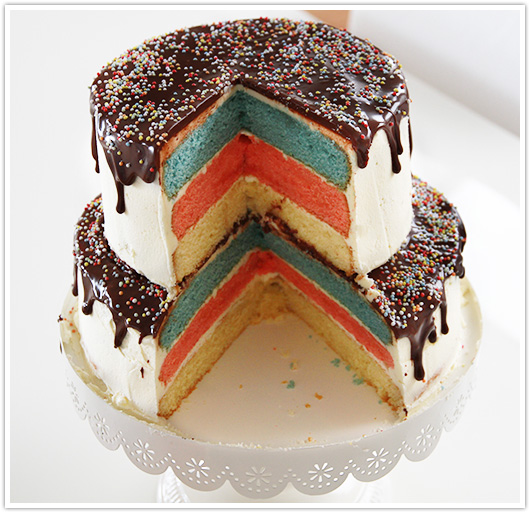
Inside of a Vanilla cake with a chocolate ganache drip | Paper & Party Love

This was my first time making a cake like this with the chocolate ganache drip.  I was nervous to try it out and here are some tips that helped me:

  • Make sure the ganache is thick, but not too thick.  If it’s too thick, it won’t run down the sides, and if it’s too thin, it will run down too much.  I watched this video to get a good feel for how thick it should be. 
  • I used a frosting spatula to help the ganache roll over the sides.  It helped to keep the ganache smooth on top while I was trying to push it over the edges.
  • Also, I think it helped that my cake was cold.  I put it in the fridge for about 1 hour before I poured over the ganache. I read that would help the warm ganache “freeze” on the sides. It worked for me!

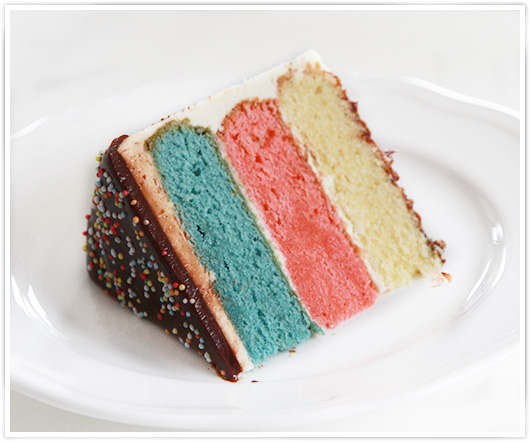
Cake slice | Paper & Party Love

The cake is a vanilla cake with a white buttercream frosting covered with a chocolate ganache drip. 

Cake recipe: 

Makes enough for all 6 layers of cake.

Ingredients:

Cake
12 eggs
660 grams / 24 oz of self-raising flour
660 grams / 24 oz of sugar
660 grams / 24 oz of butter at room temperature
2 tsp. of vanilla extract
Food coloring of your choice

Buttercream Frosting
2 cups butter at room temperature
5 cups powdered sugar

Chocolate Ganache
1 cup cream
9 ounces of chocolate

Cake Instructions:
  1. Preheat your oven to 180 C / 350 F and grease and flour your baking pans. 
  2. In a large bowl, cream the butter and sugar until it is light and fluffy, approximately 5 minutes.  
  3. Beat in the eggs one at a time.
  4. Add the vanilla extract.
  5. Pour in the flour a little at a time.  If the mixture is too thick, add milk one teaspoon at a time until you reach the desired consistency.
  6. At this time, to make the different colored layers, separate the batter evenly into three bowls.
  7. Add the food coloring to the batter to reach your desired color.  I used blue and pink (the colors of the party) and left the other layers a natural color.
  8. Pour the batter into your greased pans. To make the different sizes, I used a 7 inch and a 9 inch baking pan.
  9. Bake in the pre-heated oven for 15-20 minutes or until a toothpick inserted in the middle of the cake comes out clean.
  10. Cool your cake completely before frosting it.


Frosting:
  1. In an electric mixer, beat the butter until it is creamy.
  2. Slow down your electric mixer and slowly add in the powdered sugar.  
  3. If the mixture seems a bit dry, you can add in small amounts of milk (1 teaspoon at a time) to make it creamier.


Building Your Cake:
  1. Take the larger layers of cake and begin to stack them in the order of your choice.  In between each layer, add frosting. I used three layers.
  2. Add frosting to the top and sides of the cake.  
  3. Crumb coat your cake first, which means put a thinner layer of frosting on the cake and then place it in the freezer or fridge for about 20 minutes. This will help you get a smoother layer of frosting on the outside by “sealing” the crumbs.  
  4. Frost the cake and place it in the fridge again for about 30 minutes while you make the ganache.
  5. Repeat the steps for the smaller cakes.


Chocolate Ganache:
While the cakes are in the fridge, you can make the chocolate ganache.
  1. Chop your chocolate into small pieces and place it in a bowl that can withstand some heat.
  2. Heat the cup of cream on the stove.  Heat it until it just begins to boil.  There will be some foam around the edges when it is ready.
  3. Pour the cream over the chocolate.
  4. Whisk the cream and chocolate together until smooth.
  5. Let it sit for about 5-10 minutes. It will thicken up a bit while it is cooling off.
  6. Once it is not so warm anymore, pour it over your cold cakes.
  7. Add sprinkles if desired.
  8. Put the cakes in the fridge again for a few minutes to “set” the ganache before serving.

I stacked the cakes after the ganache was set in the fridge.  Once it was ready, I simply stacked the smaller cake on top of the bigger cake.  I believe that you are supposed to use cake dowels and place the smaller level on a piece of cardboard for stability and so that the cake doesn’t collapse.  I did not do this and it is still standing two days later.  If this was for a wedding or a more formal occasion, I probably would have tried to use these items to be sure that the cake wouldn’t topple over or collapse.

I hope you enjoy the cake!

Sweet Mondays: Concorde Cake

Monday, March 31, 2014

Concorde Cake by Paper & Party Love

I first came across this cake in the Philippines when I was younger and would go there to visit my family.  It was always a really special treat to have this for dessert.  It is made from layering chocolate mousse with chocolate meringues and then sticks of chocolate meringue are placed on the outside and on top. The meringue that is layered with the chocolate mousse on the inside of the cake becomes soft from being in contact with the chocolate mousse, but you have the crunch from the meringue on the outside,  and the result is a rich decadent chocolate dessert. You only need a little piece, but you may go back for seconds if you are a chocolate lover like me.

I recently went back to the Philippines to visit and we happened to stop by the bakery that had this cake.  I had to have my husband and kids try it.  They loved it too!  It is something really different than what they were used to in a cake.  No sponge, just mousse and meringue.

Concorde Cake from Manila | Paper & Party Love

When I came across this picture from our vacation, I knew I had to try and recreate it. Well, not that cake exactly since it is huge, but I definitely had to try the recipe.  Once I searched for it, I found that the cake had a bit of history to it.  It was created by a French Patissier named Gaston Lenôtre in the 1970's.  Some say that it was created to celebrate the first flight of the Concorde airplane, and that is where it got it's name. Gaston Lenôtre also started the Lenôtre shops, which are beautiful upscale bakeries in Paris.  

It takes a bit of time to make it, but the process is relatively easy.  First you make the meringues, both in circle shapes and tube shapes, then you make the chocolate mousse. Once they are finished, you layer the mousse with the disc shaped meringues and stick the tube shapes on the outside. You can use any remaining meringues to crumble on top.  It was my first time making chocolate meringues and they were not as hard as I thought they would be. Granted, my tube shape meringues didn't turn out perfectly straight, but as the French would say, c'est la vie! It still tasted very good.

Concorde Cake Slice | Paper & Party Love

Looking at the inside of the cake, you can tell it's definitely for chocolate lovers!

If you are interested in trying to make this cake, here is the recipe that I used.  I followed it for the most part, but I made my meringue circles about 5 inches wide (instead of the 8 inches they recommend) and made four circles instead of two. That way there were more layers of mousse and meringue.  Yum.

I hope you get to try a Concorde cake sometime.  It's definitely worth it!


Sweet Mondays: Rose Cake & Tutorial

Monday, March 17, 2014


Rose cake by Paper & Party Love

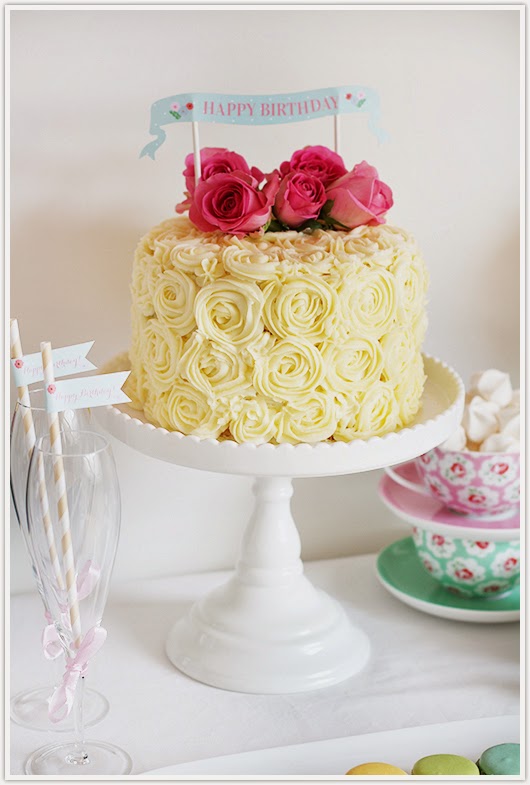
Spring starts this week! Yay! I have some spring-themed blog posts planned for you this week. First up is this rose cake to get you ready for some spring sweetness.

I designed a spring party printable collection recently (can you tell I love spring?) and as part of the photo shoot for it, I made the rose cake that you see above. It's not that difficult to make and as far as frosting goes, it's one of the easier styles to pull off.  I am by no means a great baker, but I find this one easy to do.  

To show you just how easy it is, I made a video.   I am experimenting with video for the blog and this is my first try.  Please go easy on me ;-). Feedback is welcome.

Below are some notes on the video:

-If you would like the recipe for the cake that I used,  I will post that for you soon.  It is my go-to recipe and I use it for cupcakes too.

-If you are using fresh flowers on your cakes, please make sure to place a barrier between the flowers and your cake, especially if you are not using edible flowers.  Some flowers are toxic and you don't want them to come in contact with the frosting that you will eat. I recommend parchment paper as a barrier.

I hope you enjoy the video!


Sweet Mondays: Rainbow Piñata Cake

Monday, March 10, 2014

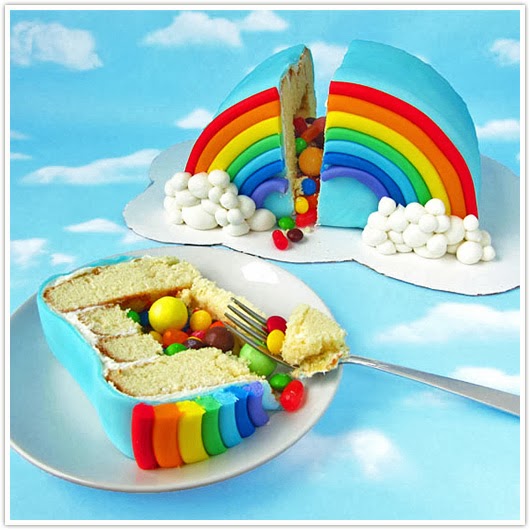
rainbow pinata cake by hungry happenings
Photo from tablespoon.com

I thought I would start a new series on the blog called Sweet Mondays, where we can start off the week looking at sweet things like cakes, cupcakes and any other types of desserts.  I love pictures of pretty desserts and I hope you enjoy it too!

For this first time, I wanted to show you this great rainbow piñata cake.  It's perfect for your upcoming spring celebrations or even for St. Patrick's day. I love how pretty it is on the outside and that there is a candy surprise in the middle. The kids will go crazy for it!

Get more pictures and step-by-step instructions on how to make this cake here.

Related Posts Plugin for WordPress, Blogger...